Setting Up a Campaign in Customer.io
Campaigns are automated flows that go to your audience based on an action they take on Union. Campaigns can’t be scheduled based on a day but are activated based on an action or “Trigger” that takes place on a user’s account. These are used for sales funnels or upselling your customer to a higher pricing tier based on their past purchases.

To set up your first campaign head over “Campaigns” in the left-hand menu bar on your Customeri.io dashboard.
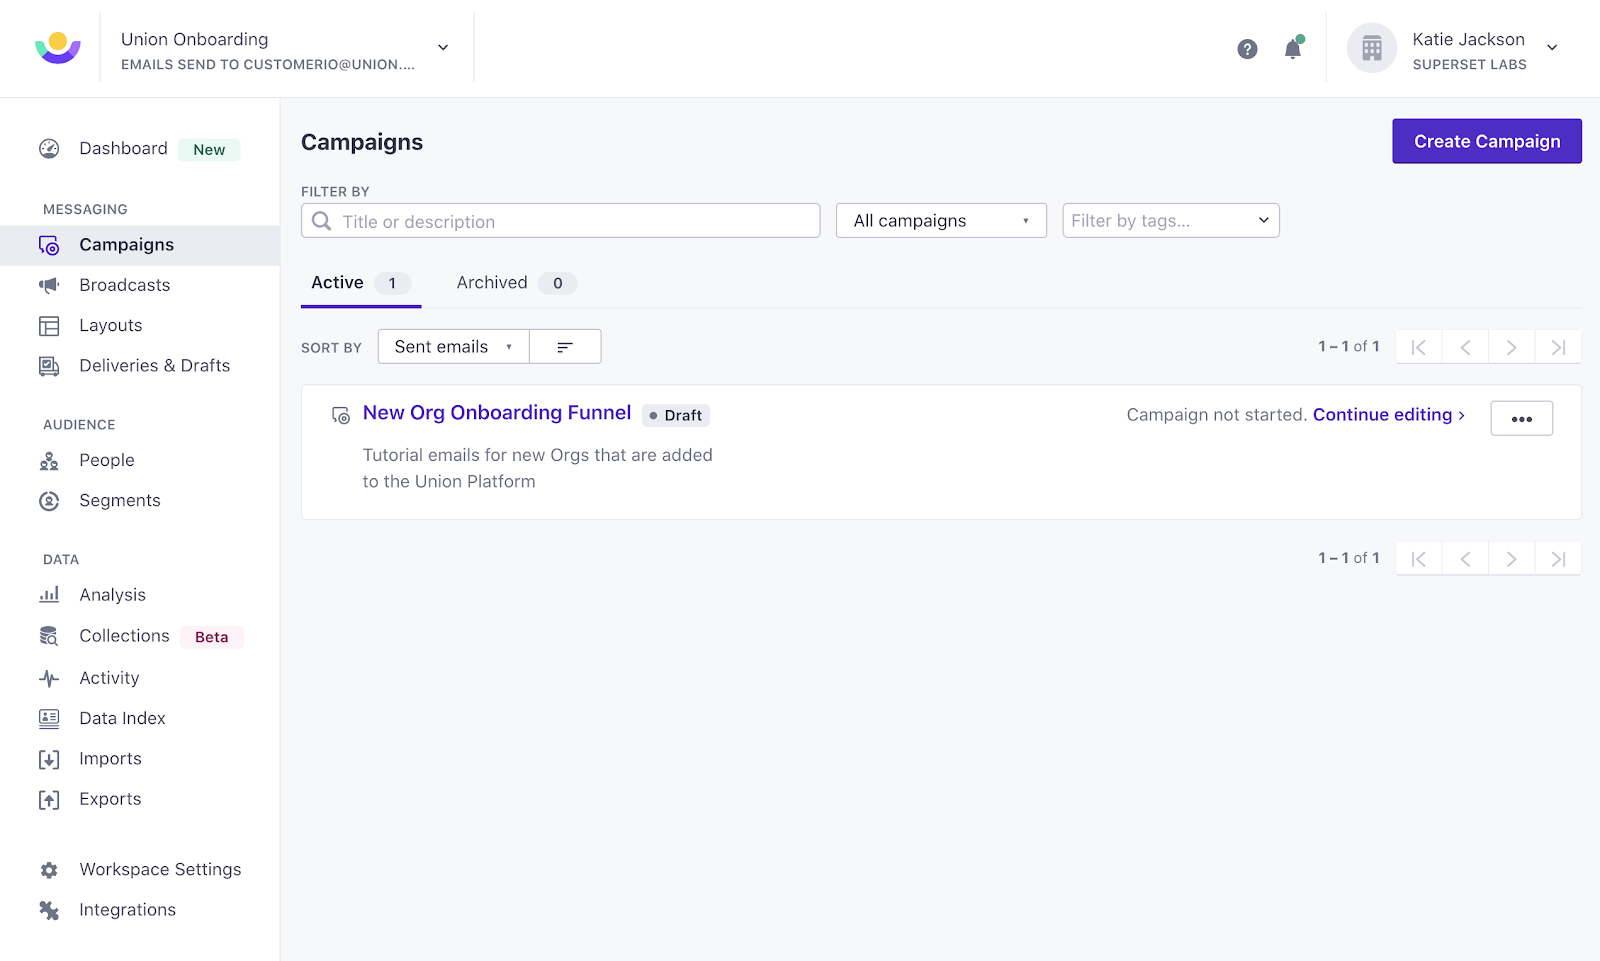
Here you’ll click the “Create Campaign” button in the upper right corner to start your first campaign.
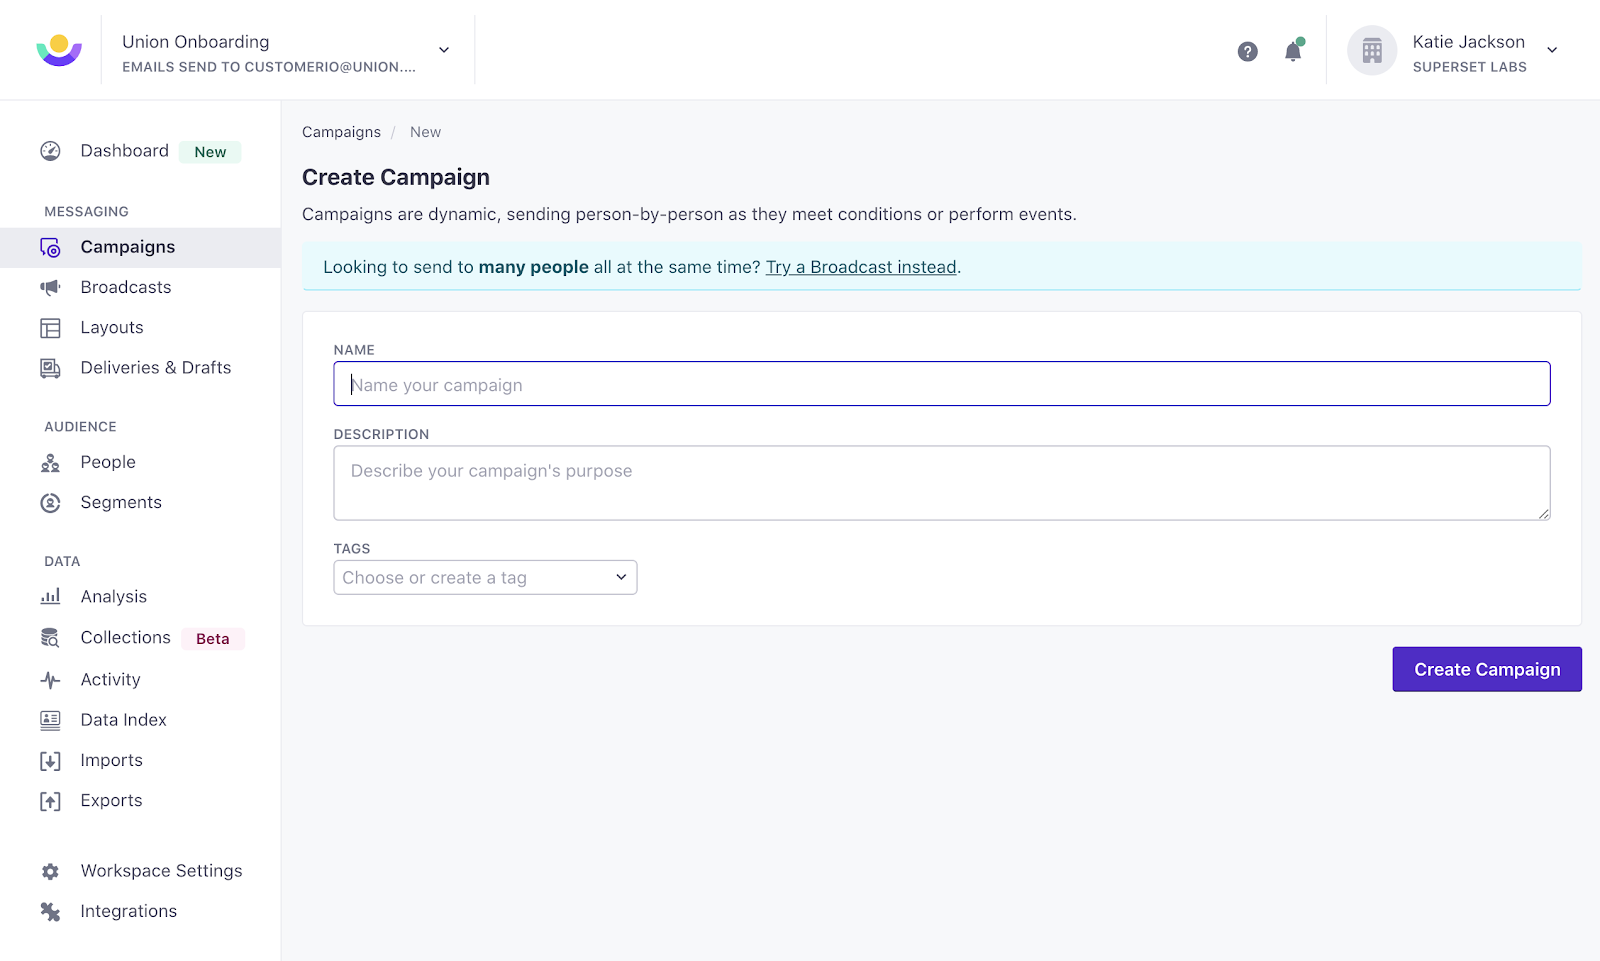
Name your campaign and give a brief description of the goal behind this campaign and who it will be targeting. This will help you navigate through your campaigns later. If there are specific dates or other elements that could change later, you could mention them here to remember in the future to update your campaign.
Once you create the campaign you’ll be asked to choose a target. For most of your campaigns you’ll choose “Conditions are Met” in order to send emails to specific segments.
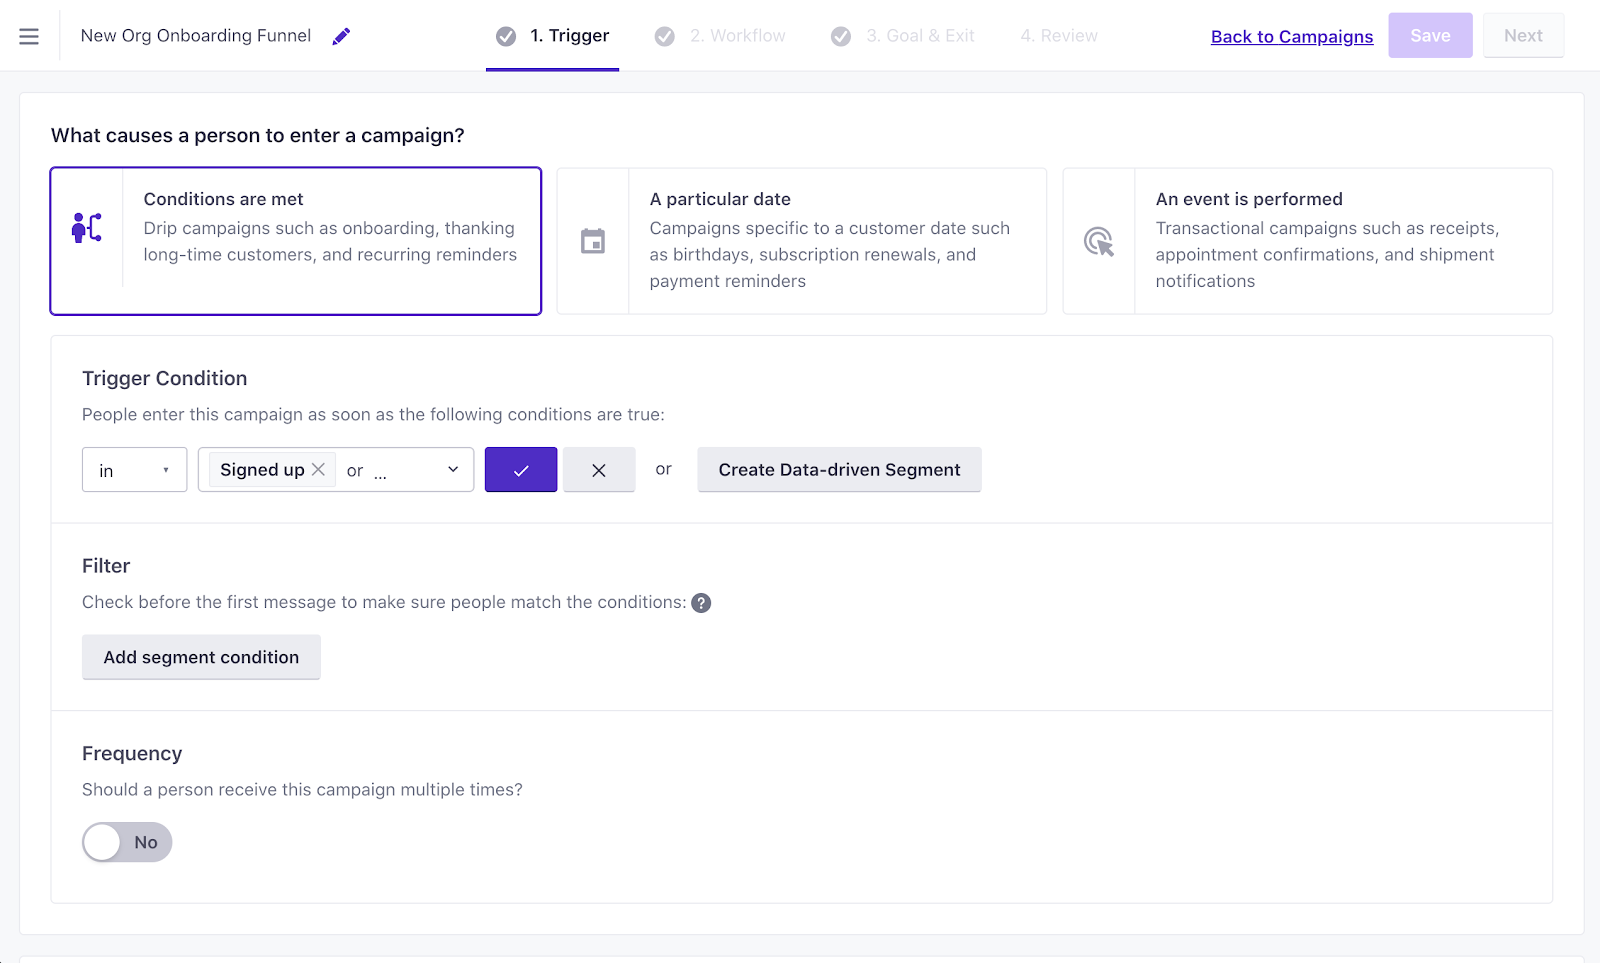
Select a segment that you’ve already created and hit the purple checkmark or click on “Create Data-driven Segment” to create a new segment here. Once you’ve chosen an audience to send your messages to, you can click “Save” in the upper right-hand corner and then hit “Next”.
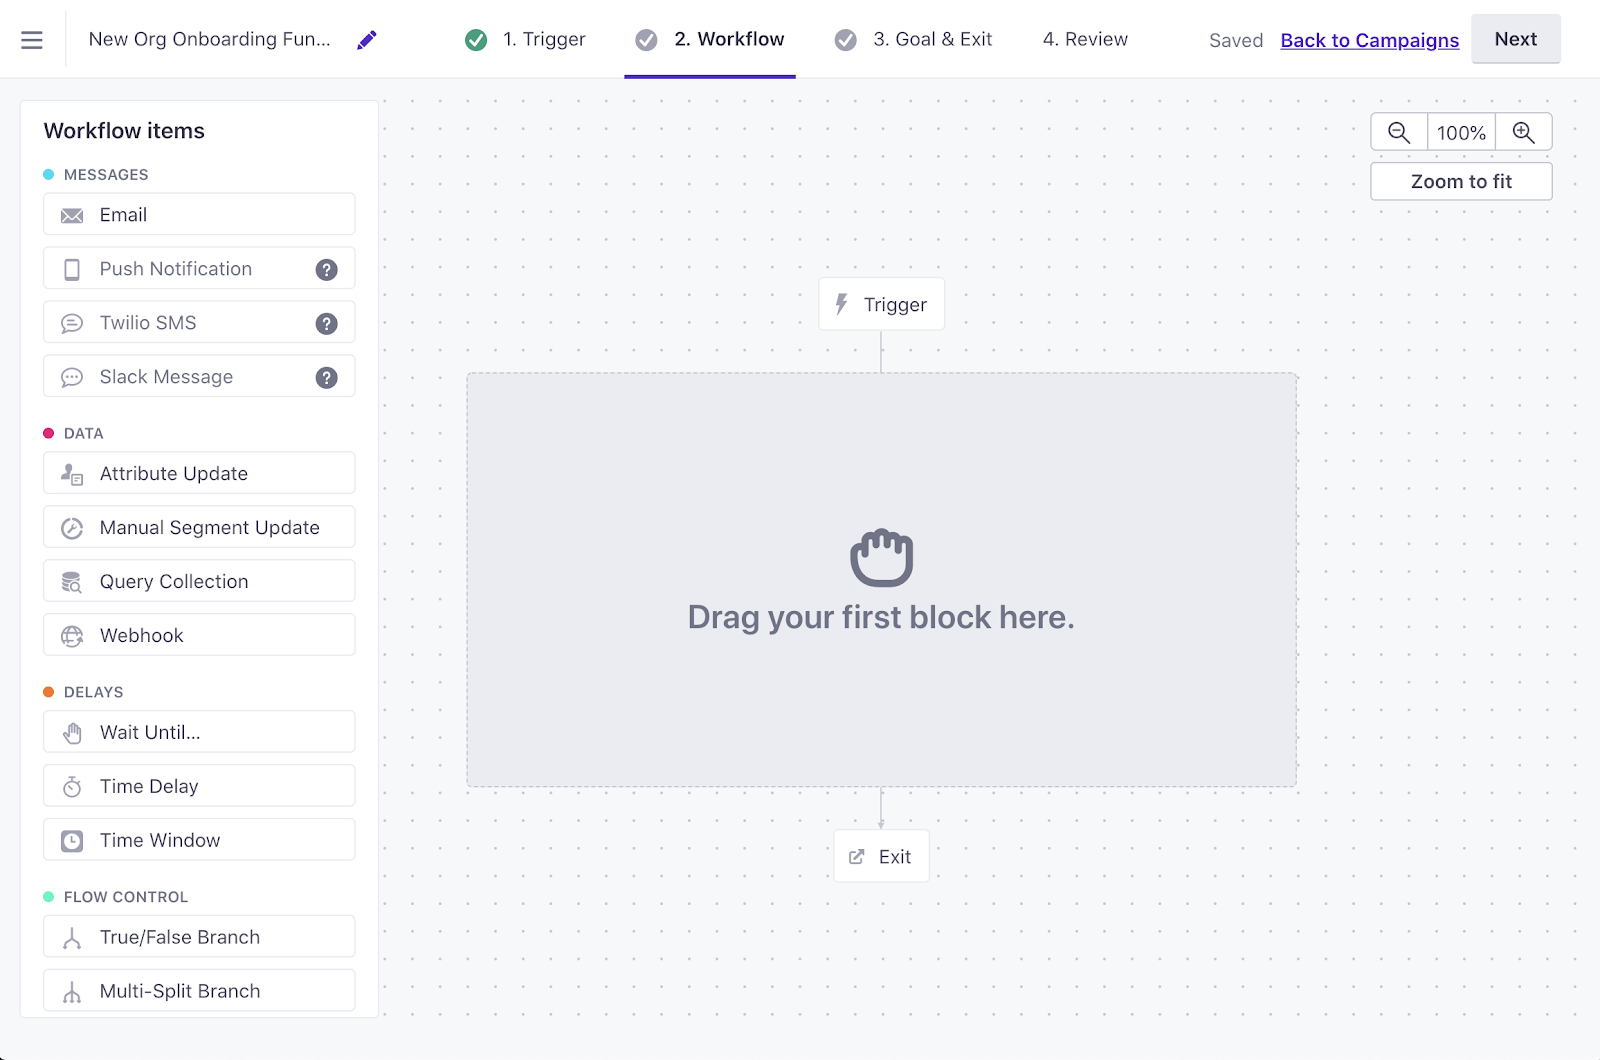
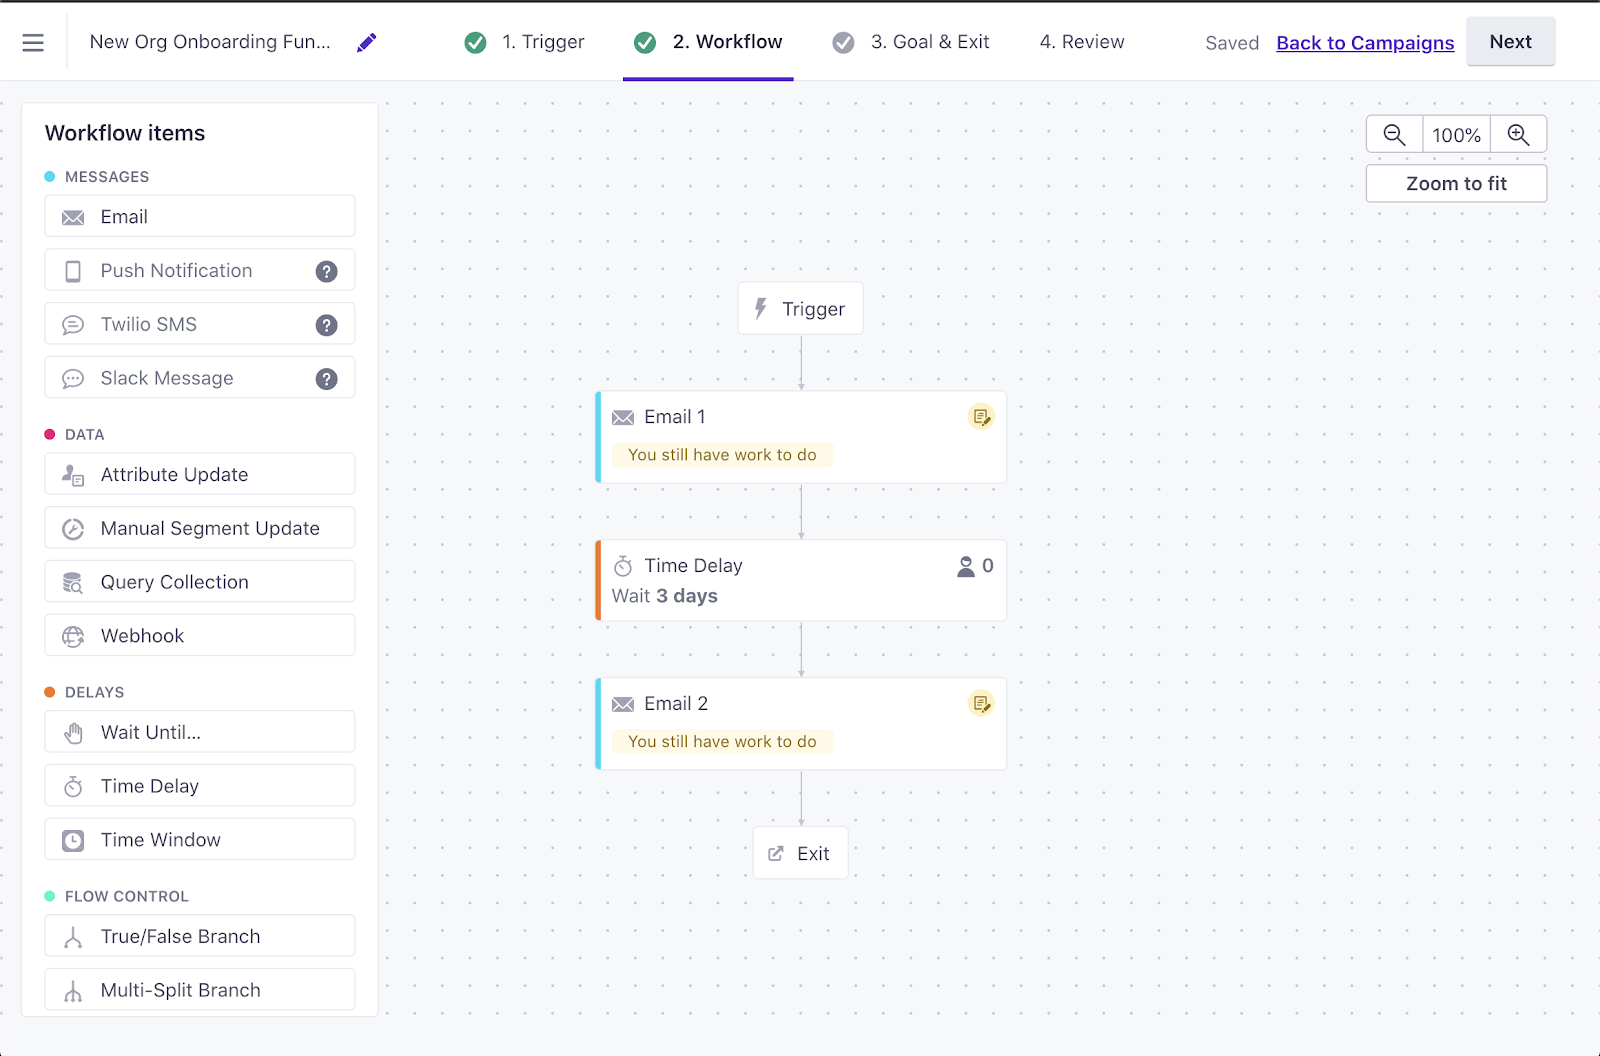
This is where the fun begins. In the workflow dashboard, you’ll start laying out the funnel of your campaign. Using the drag and drop features you can create an automation that fits your needs. Click on one of the elements such as “Email” and drag it to your board. To separate this out from the next email add the “Time Delay” element and choose the amount of time you want to wait before sending the second email.
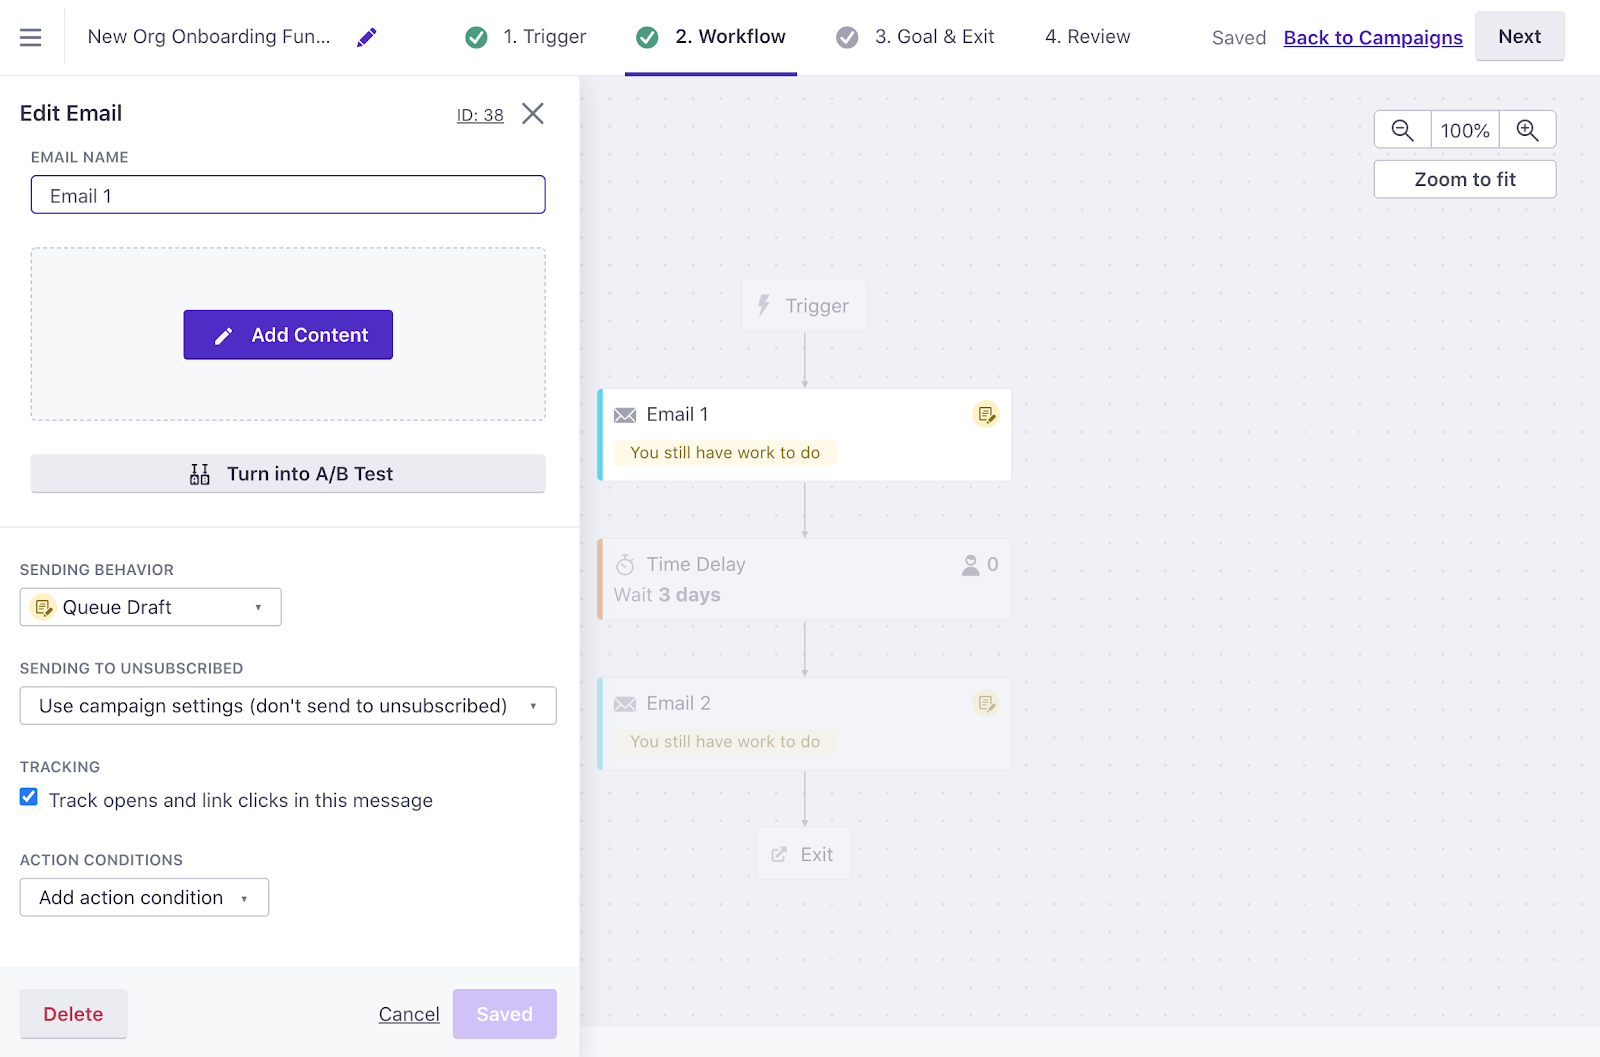
By clicking on the elements in your timeline you can then edit them.
Within the email element, you can change the name of the element to create organization for your team. This name doesn’t show up in the email and is for your eyes only. You can then click on “add email” to build an email which will give you options of templates or previous emails you’ve created to start with.
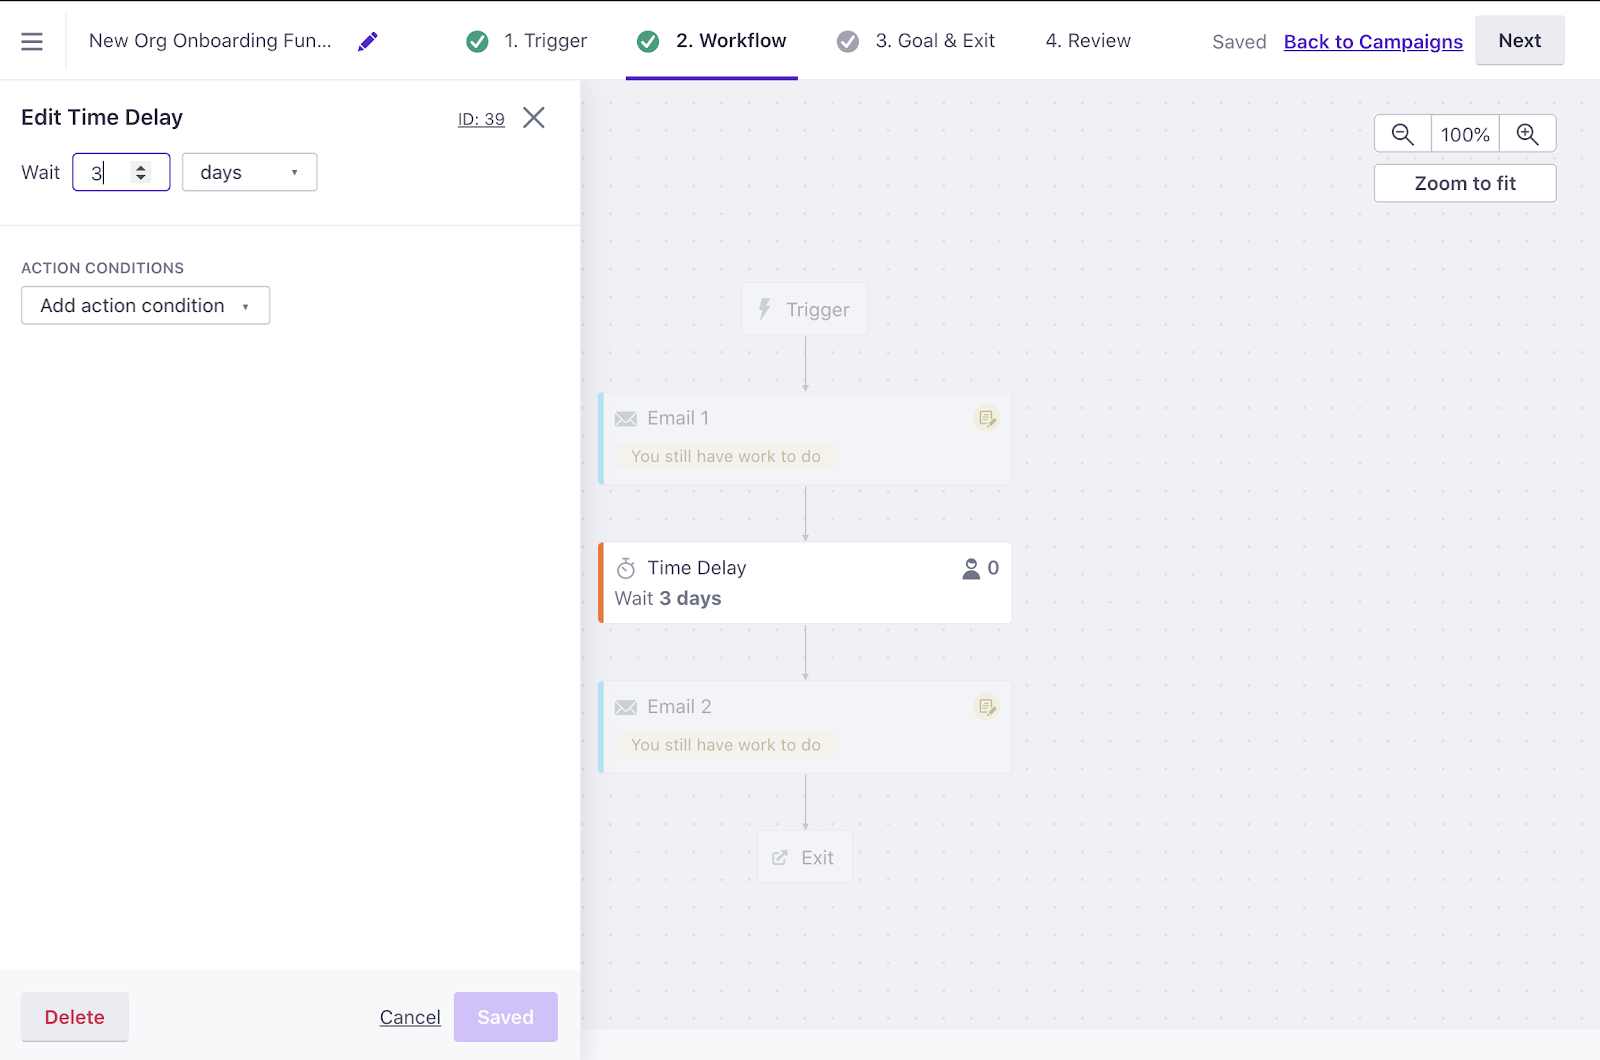
Click on the Time Delay element on your timeline and you can adjust the timing of when you send out the next email.
You can choose to add as many emails as you’d like in your funnel with time delays in between each one to ensure that you aren’t spamming your audience. Once you’ve created all your emails you’ll be ready to move on to the next phase.
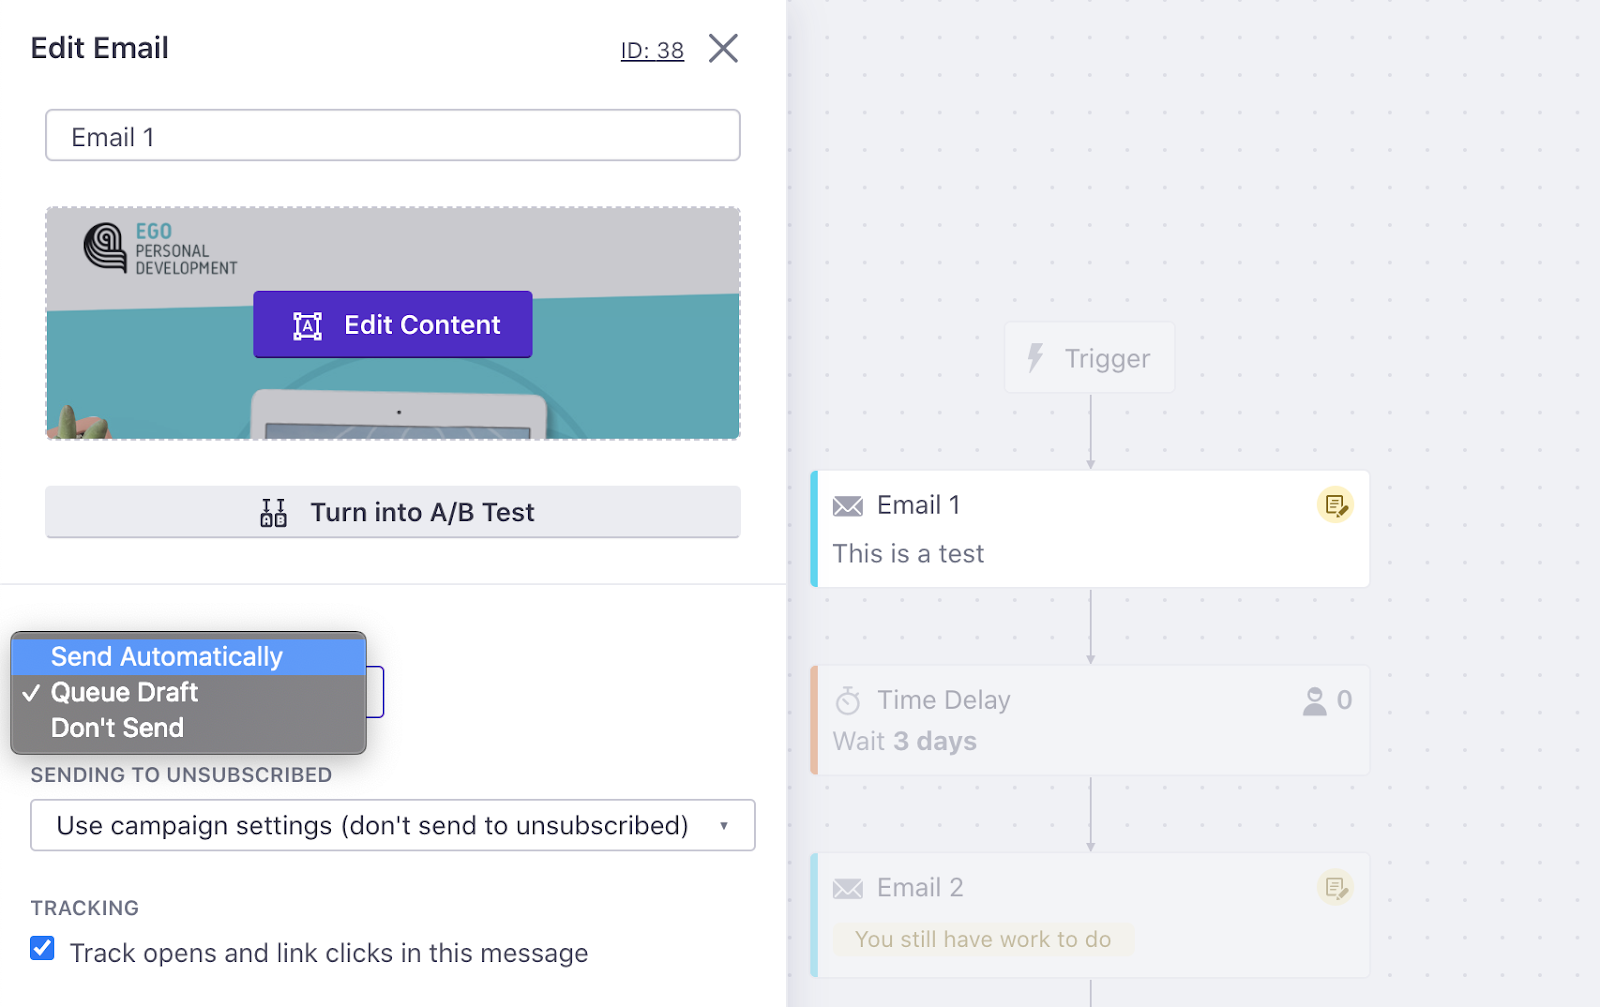
But before this email will be ready to publish you need to make sure that each individual email in the campaign has an updated Sending Behavior stat to “Send Automatically” within the email element.
Once the design of your campaign is complete you’ll need to define goals for it. Of course, you can skip this part but to track conversions or allow your customers to leave the funnel early, you’ll need to select a goal. These goals are based on new segments that your audience will join. For example, if you are running a free trial campaign then the goal is to turn your customer into a paying customer, you can create a segment for customers who are paying and when they enter into that segment they will leave this campaign because it’s done its job.
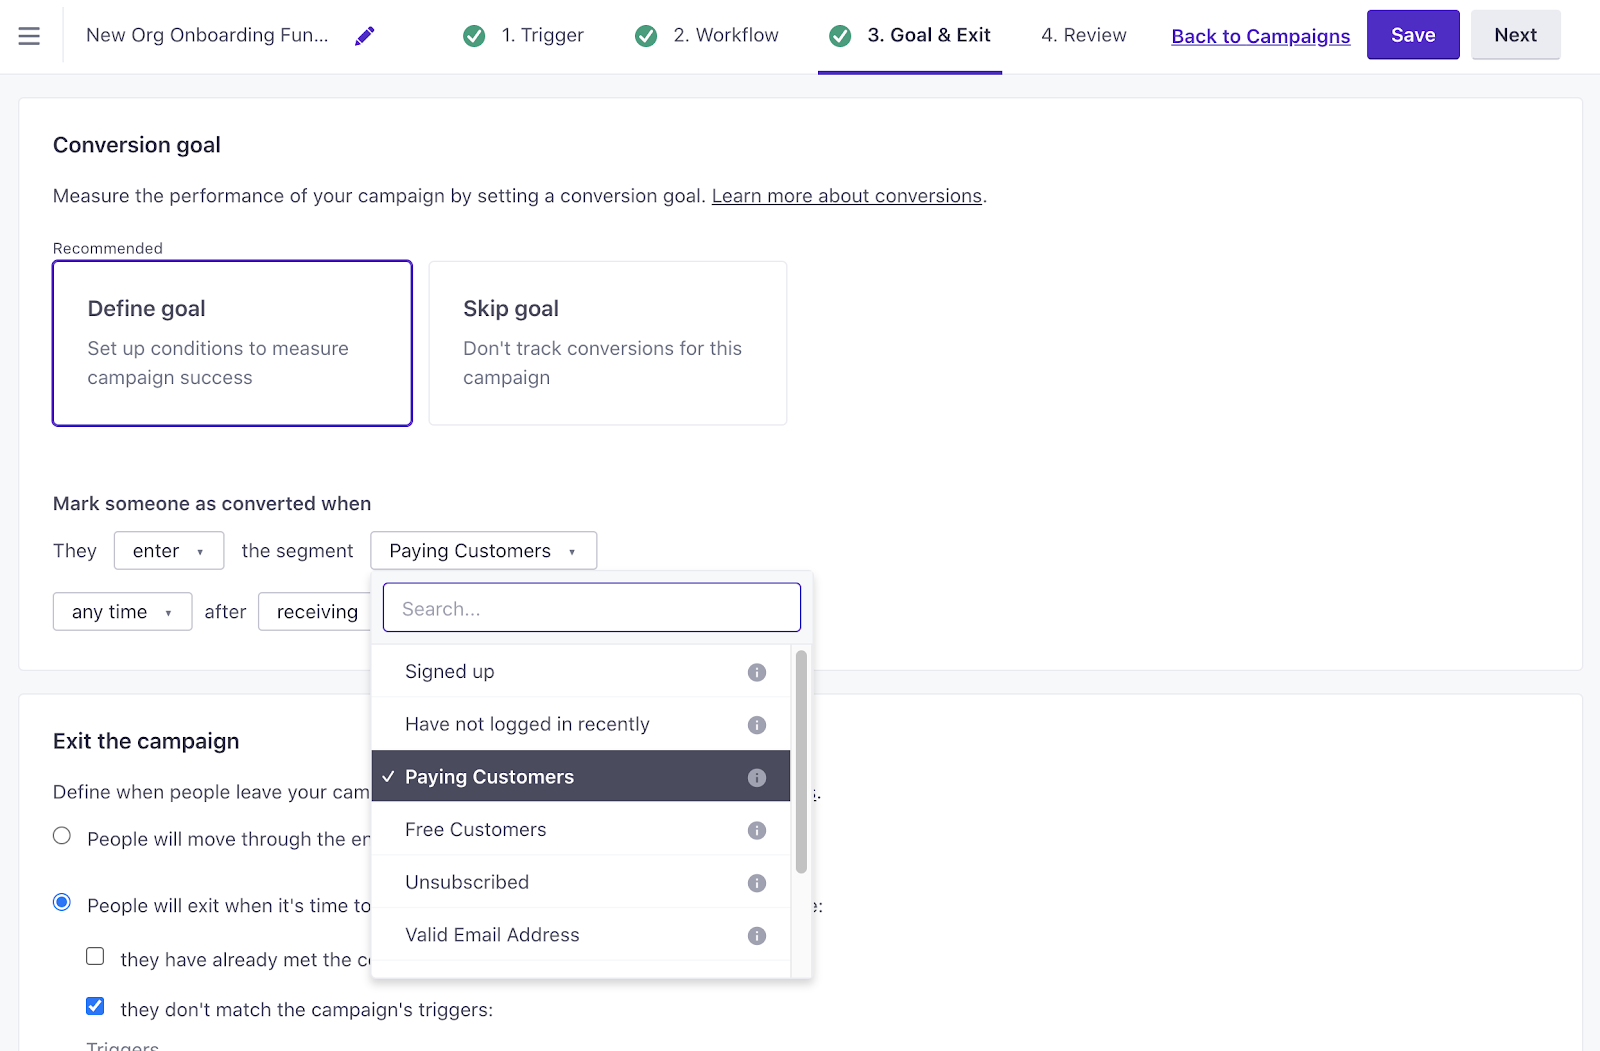
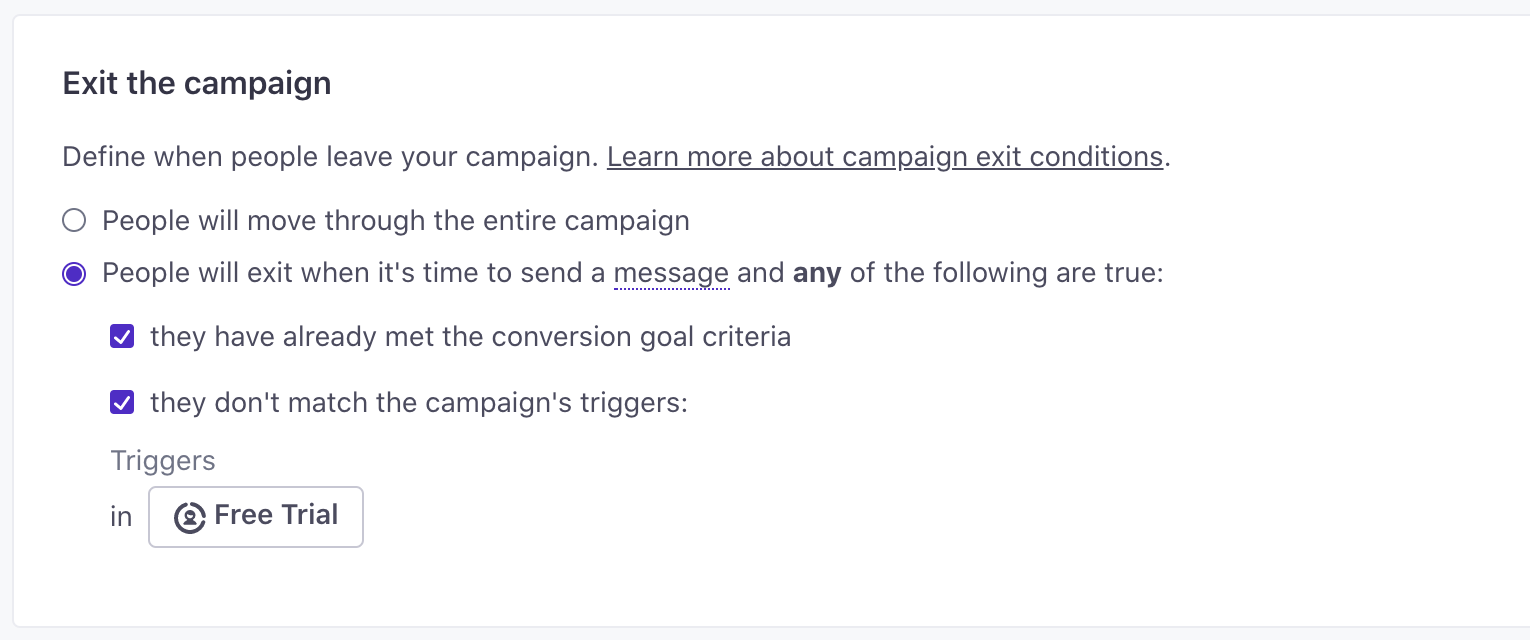
Make sure that in the “exit the campaign” section you’ve selected “they have already met the conversion goal criteria”. This means that if your customer meets the goal (they become a paying customer) they will then leave this campaign and not receive any more emails from it.
Any segment that you want your customers to join after entering this email campaign will need to be pre-built in order to show-up in the drop-down menu. Once you’ve selected a goal you can click “Save” and “Next” in the upper right-hand corner to then review your final campaign.
Here is your last chance to double check that everything looks correct before starting your campaign. Remember to double check your emails too in the workflow dashboard and ensure that all links go to the right place, the subject line is enticing to click and there are no spelling errors within your emails.
Once you’ve decided that your campaign is ready to go, scroll to the bottom to start the campaign. You’ll have the option of sending to current and future additions, meaning anyone who is already in your segment AND anyone who is added. Or you can select, future additions only, meaning anyone who is added to that segment from this point forward.
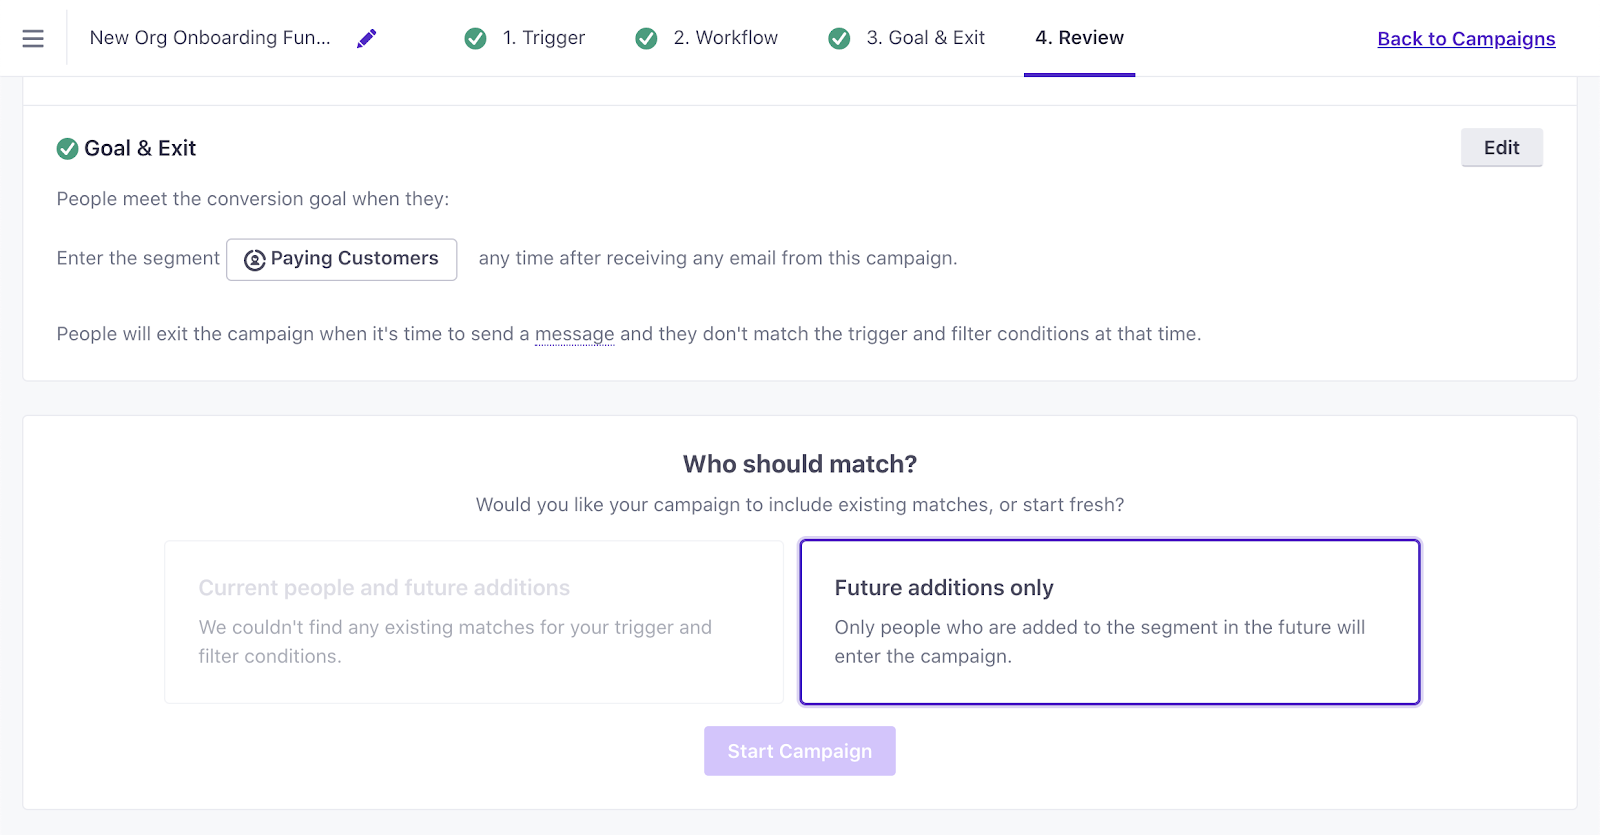
Choose which audience you want to send to and then start your campaign.
Any segment that you want your customers to join after entering this email campaign will need to be pre-built in order to show-up in the drop-down menu. Once you’ve selected a goal you can click “Save” and “Next” in the upper right-hand corner to then review your final campaign.
Here is your last chance to double check that everything looks correct before starting your campaign. Remember to double check your emails too in the workflow dashboard and ensure that all links go to the right place, the subject line is enticing to click and there are no spelling errors within your emails.
Once you’ve decided that your campaign is ready to go, scroll to the bottom to start the campaign. You’ll have the option of sending to current and future additions, meaning anyone who is already in your segment AND anyone who is added. Or you can select, future additions only, meaning anyone who is added to that segment from this point forward.
Choose which audience you want to send to and then start your campaign.
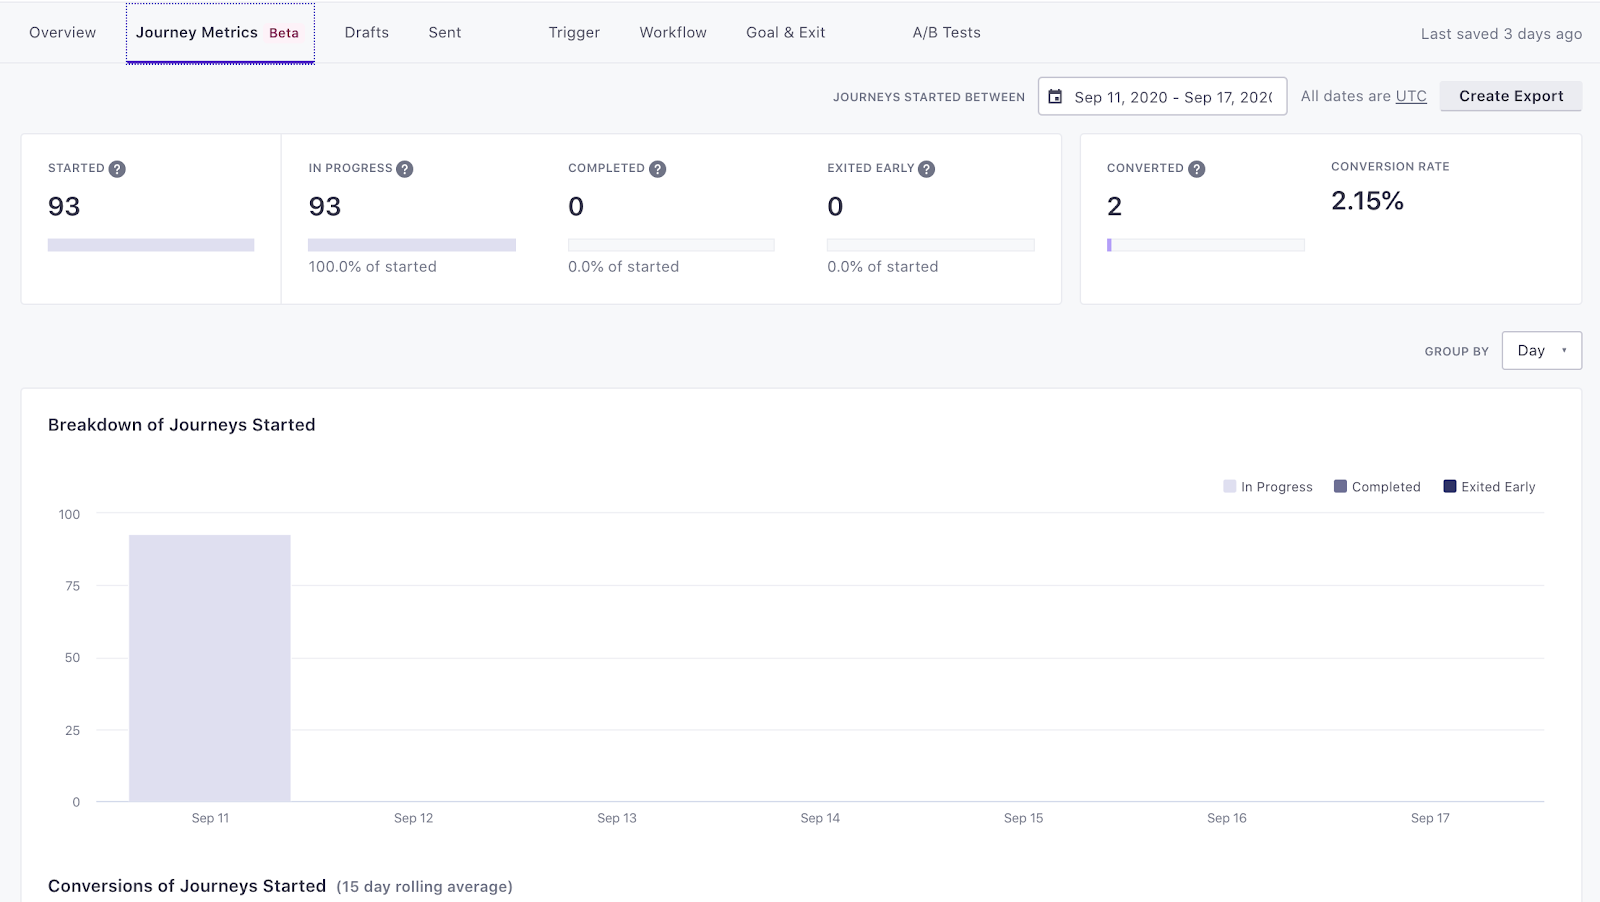
Now that your campaign is running, you can go back to the campaigns tab on your menu bar and review the analytics of this campaign at any time. You’ll be able to see the success of the journey and where people are dropping off. Review the open and click rates, how many people have unsubscribed, and what links people are clicking on. Any emails that are underperforming can be turned off at any time.
If you’d like to make changes to your campaign after you’ve published, go right ahead! From that point forward the changes will take effect. You can add more emails, update copy, remove emails, you have full control of this campaign at any point.