How to Send a Broadcast to a Specific Segment in Customer.io
If you need to send a Broadcast (one time email) to a specific group of people for instance, a certain subscription, click on Broadcasts in the left-hand menu bar.
Here you’ll see all your Broadcasts including those previously sent, scheduled, and drafted. Once you’ve sent broadcasts you’ll also be able to see analytics here. Click on the Create Broadcast in the upper right-hand corner to create a new email.

You’ll want to start off by naming this email something that makes sense to your organization. The name of the email will not be shown to the customers, this is for your organization only. Then click on Newsletter under Type of Broadcast and Create Broadcast in the bottom right-hand corner.

You’ll now be able to choose whether this email is meant for a specific segment you’ve already built-in segments or for your entire email list. Choose Segment and then Add Segment Condition
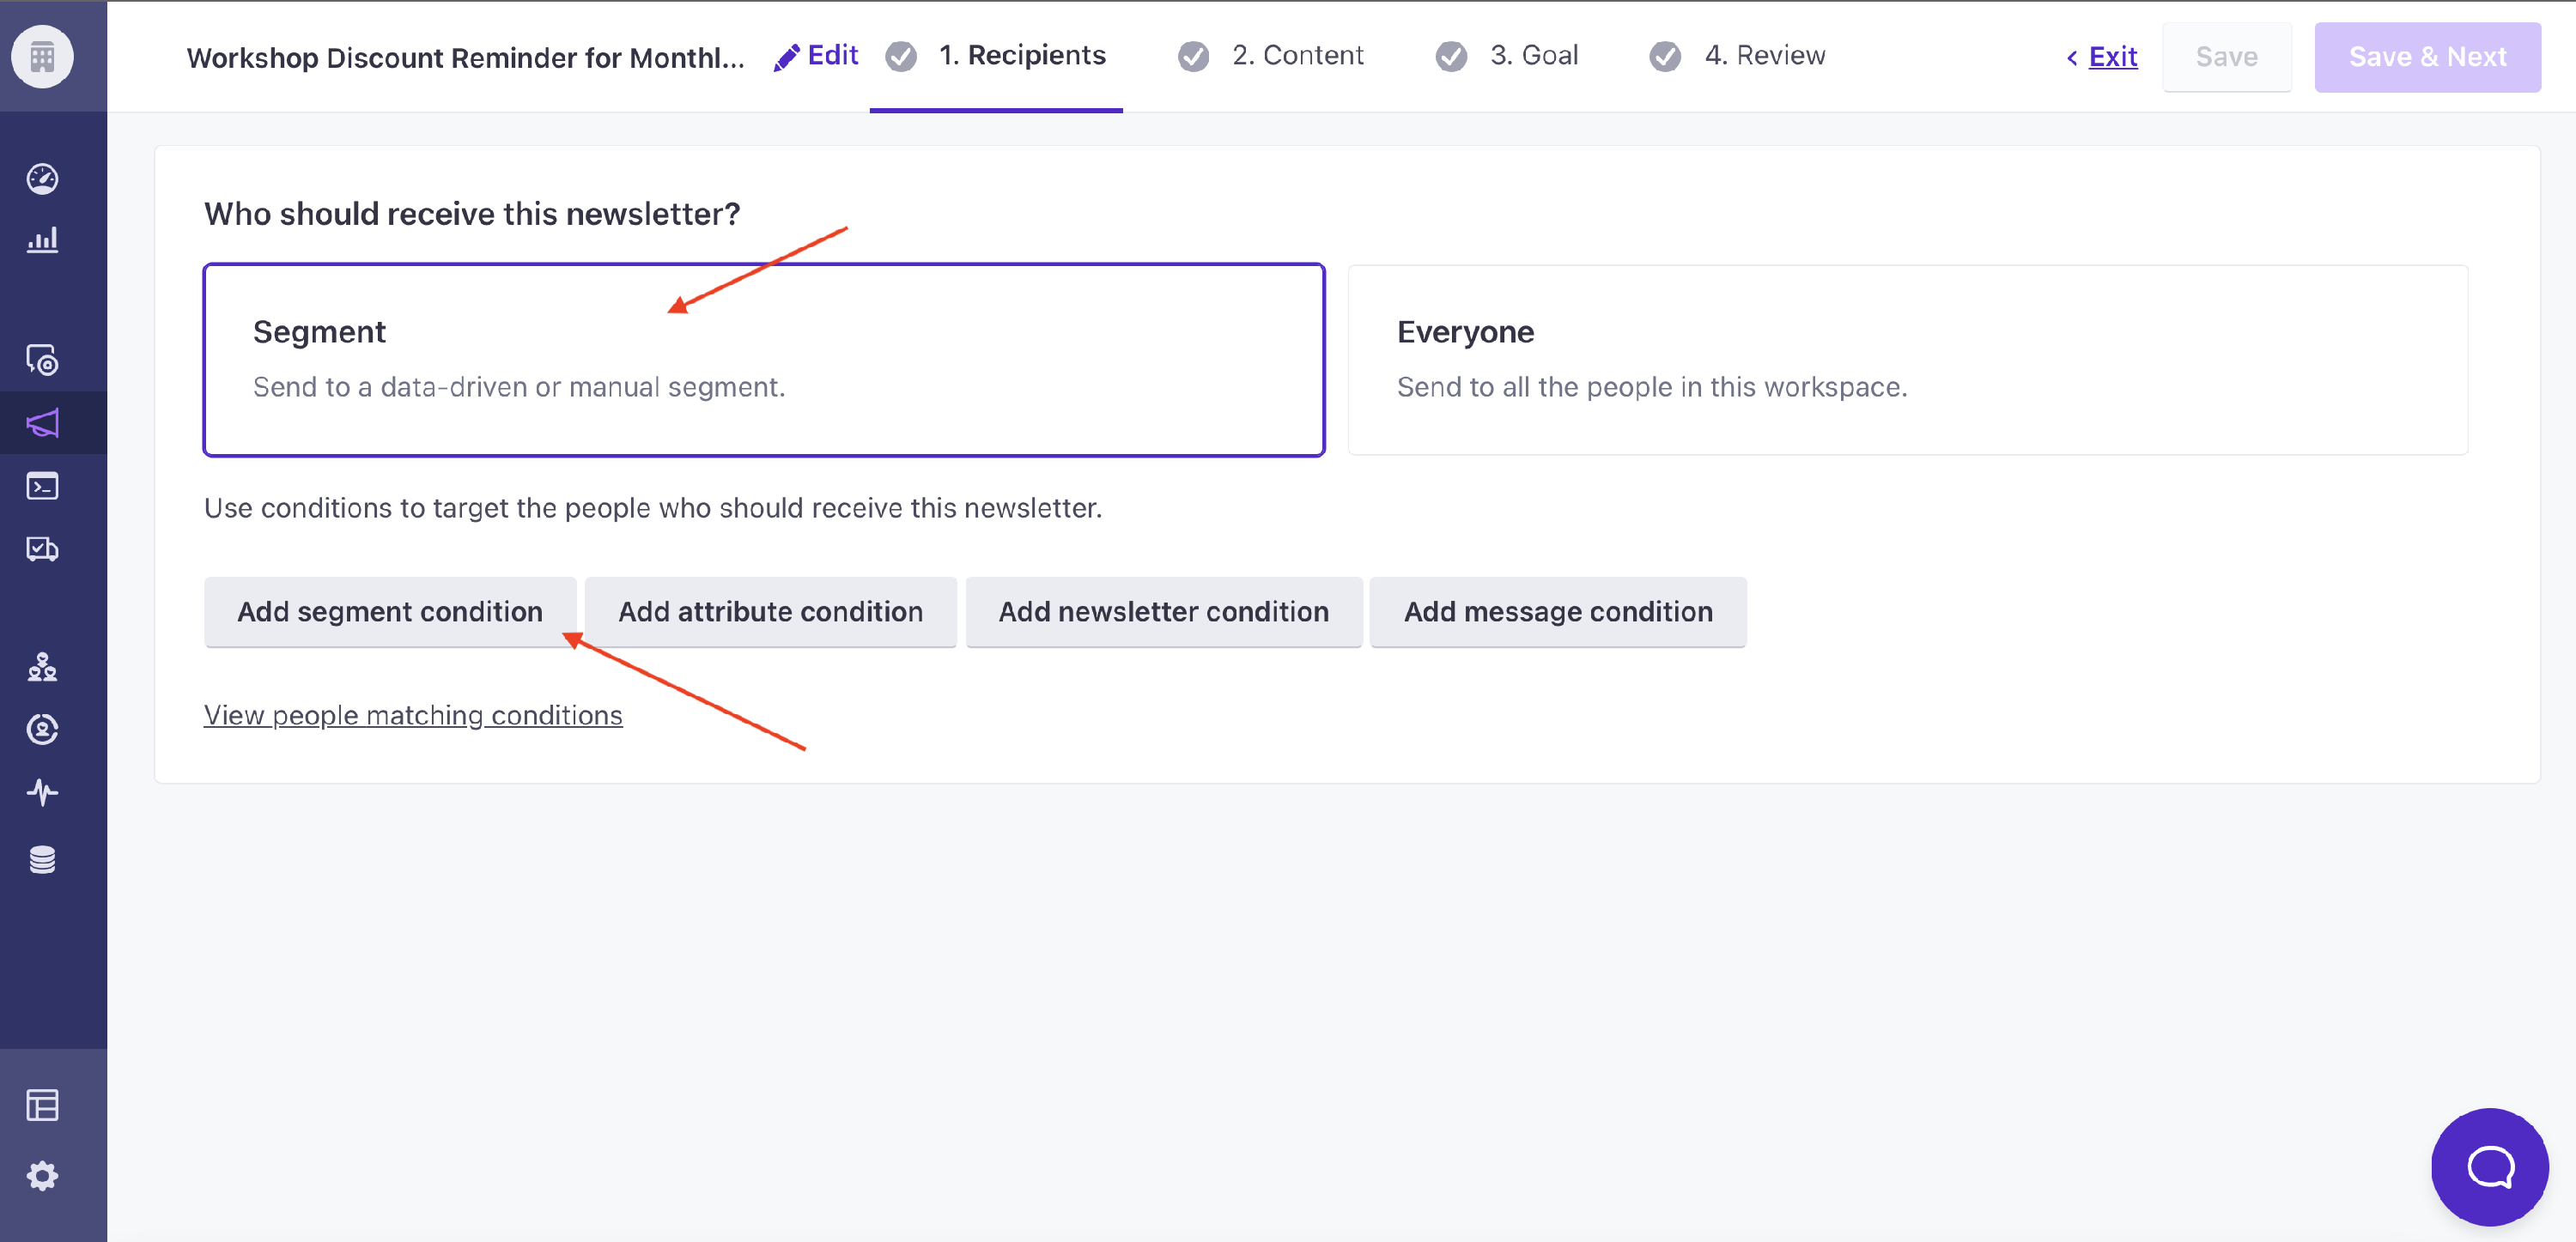

As a reminder if you're adding multiple segments, please be sure to continue continue adding in the same box so the statement is "in segment 1 or segment 2". Once updated, click Save & Next.


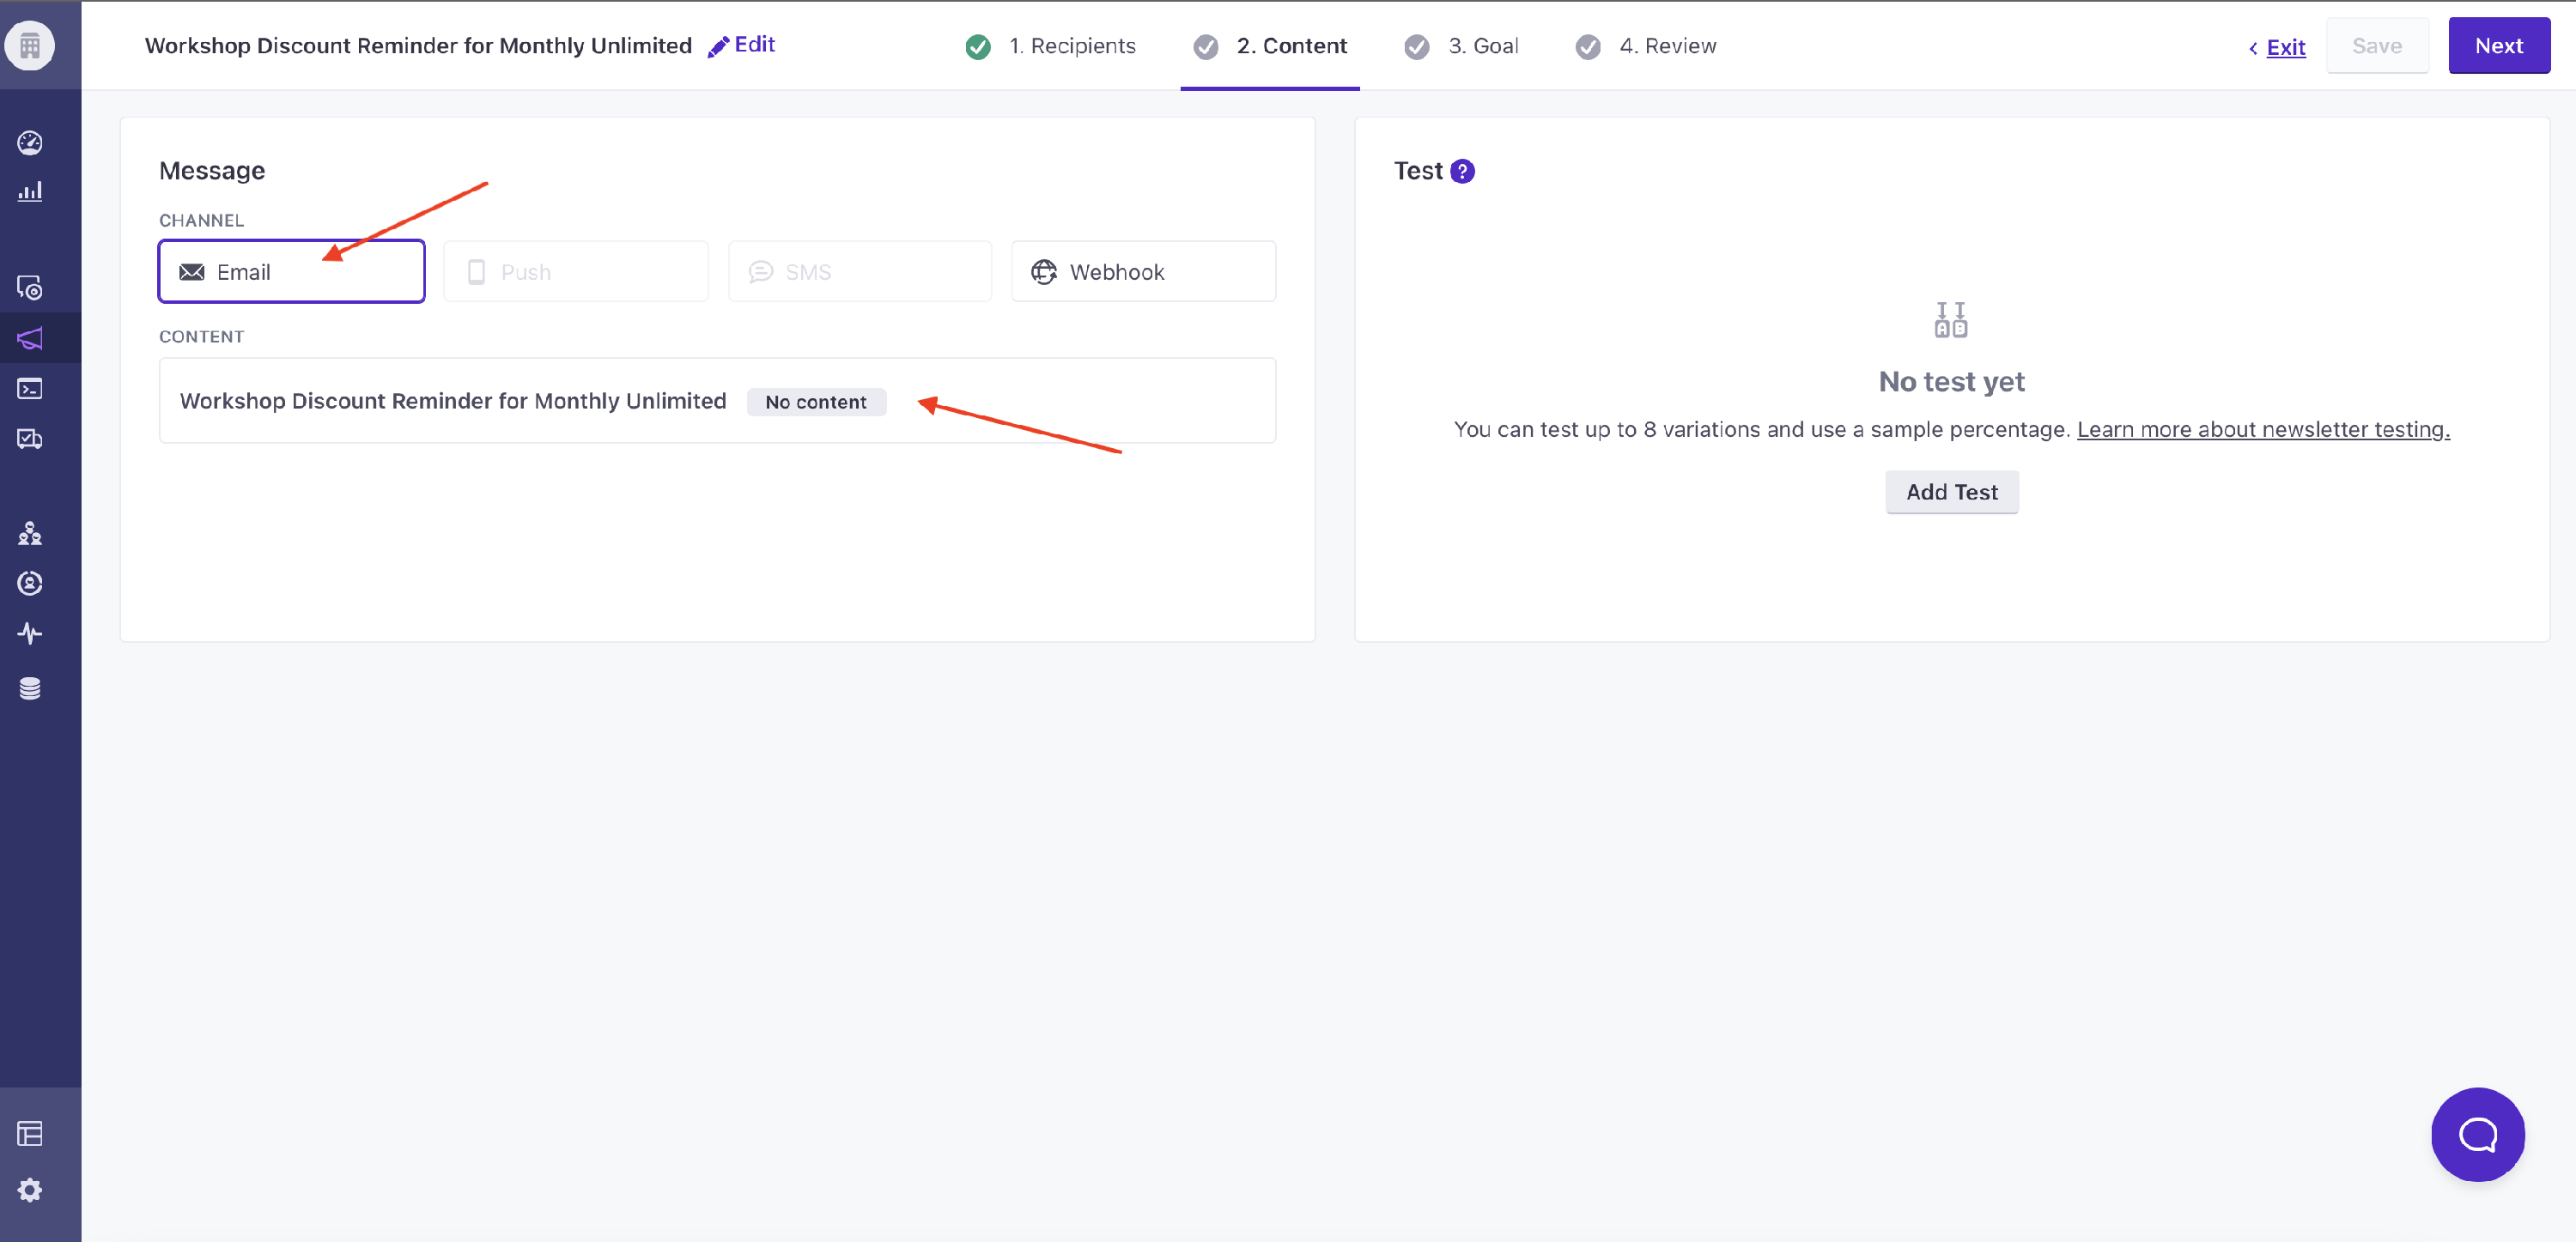
In the content section of your Broadcast, you’ll want to choose Email. Then a Content box will appear. This is your email. Hover over the box and click to edit your email.
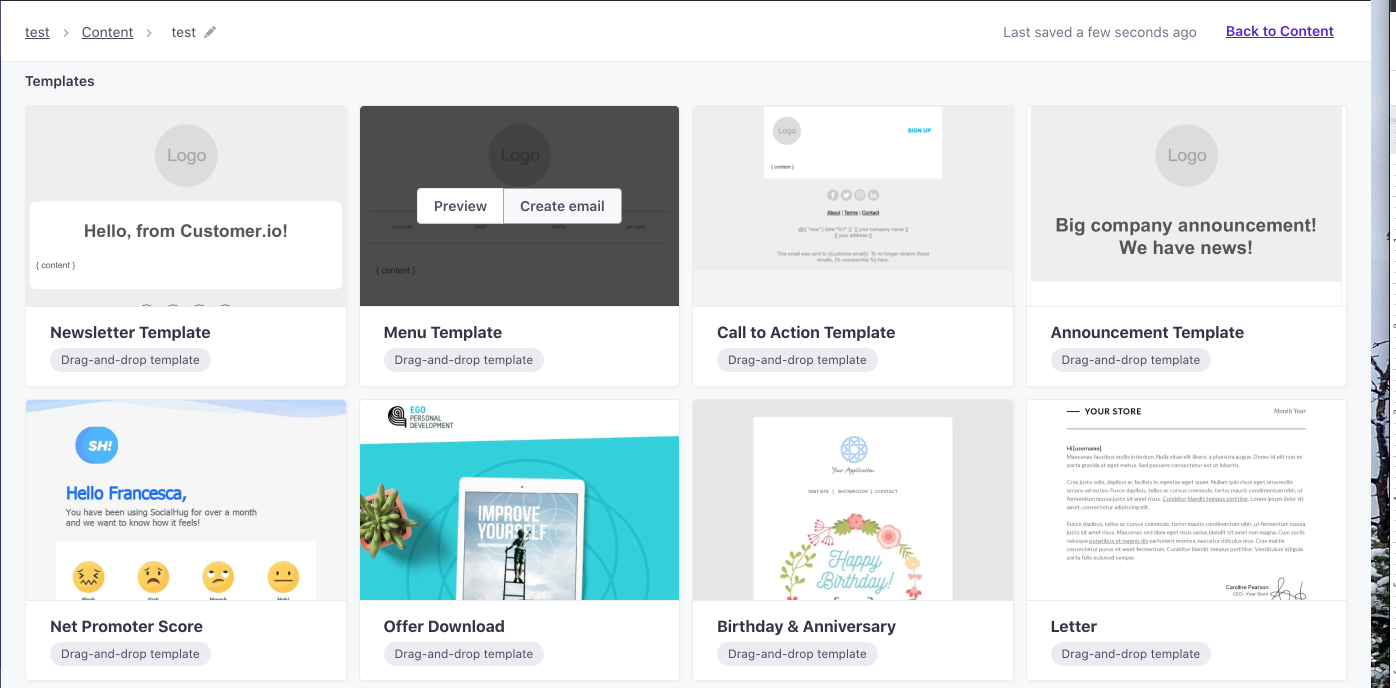
You’ll be taken to an area to choose your template. As you start building out emails, past emails will also show up here so that you can take designs that you’ve already created and reuse them over and over again. Click on the design you'd like to use and either Preview or click Create Email to start editing.
Once in the email, you’ll need to update your Subject line to remove any errors you’re receiving. On the right of the subject line, you can add Preheader Text which is the text seen next to the subject line in your inbox.

From here it’s all drag and drop to create the email of your dreams. Use the content elements on the right to add images, text, buttons, and dividers. You can even embed videos or include your social links.
By Clicking on an element of your email you’ll be given more options to update an image, change the color of text, add a link, and adjust the sizing of things.
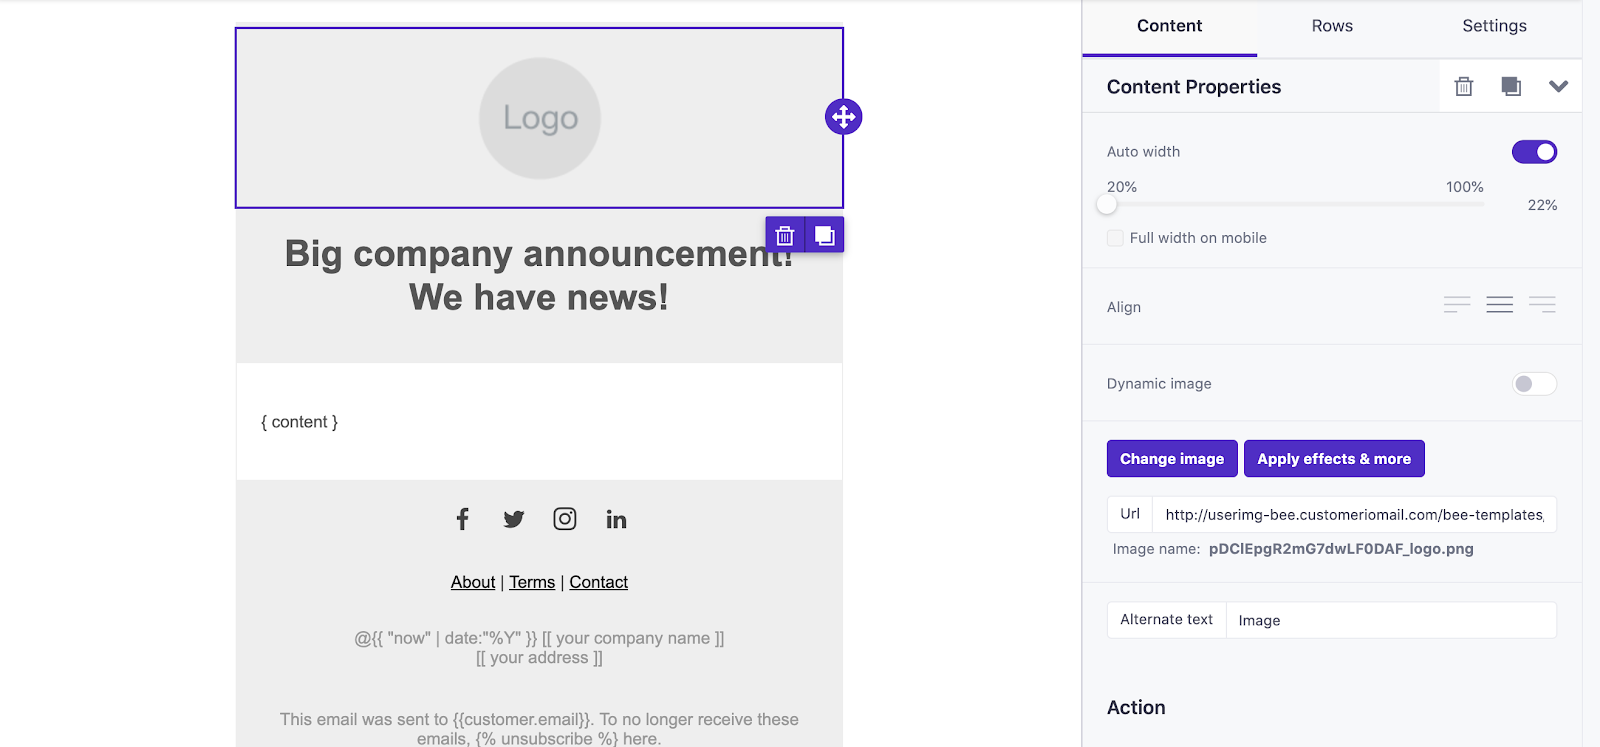
A key thing to remember when it comes to linking images is that the first URL box in the Content Properties is for the image. (You’ll see the “Change Image” button above it.) When you scroll to the bottom of the properties menu you’ll see a spot to “Link Image”. Add your website link there.
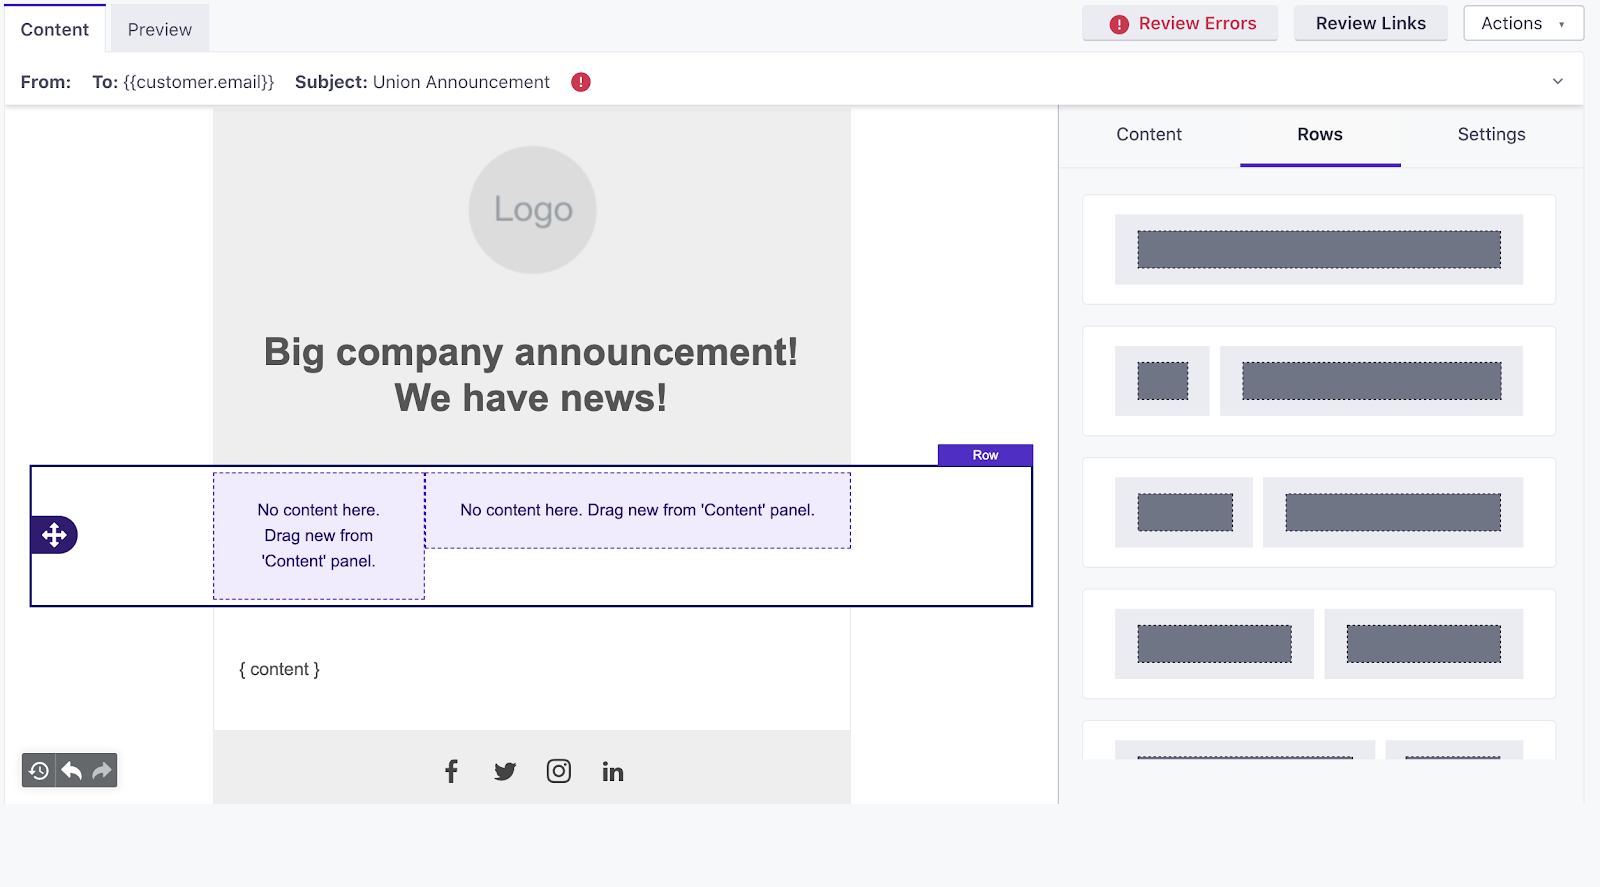
To create columns in a single row that allow for a different number of elements select “Rows” in your content box. Drag and drop the style of the row you’d like into your email.
Before you send out your email, you can click the Preview tab. This gives you a live view of what it will look like both on a desktop and on mobile. Click on your links to ensure they’re going to the right place or choose the “Actions” drop-down menu in the upper right-hand corner to send a test to your team.

Once you are satisfied with your email you can click Save in the upper right-hand corner and then Back to Content. From the content page choose Next in the right-hand corner to set your goal.
If you’d like to track conversions from your emails you’ll want to set up a goal here. Goals are defined as a customer entering a specific segment and only 1 goal can be set per broadcast. To learn more about goals in C.io, check out our video tutorial here!
Once you’ve defined your goal or chosen to skip the goal, you can click Save and Next.

Now it’s time to review your email before it’s sent out. When you’re happy with the finished product you can send it now or choose to schedule the email at a later time.
